
Makerspaces: Turning Creative Hubs Into Living Split-Flap Displays
June 30, 2026 · Captain
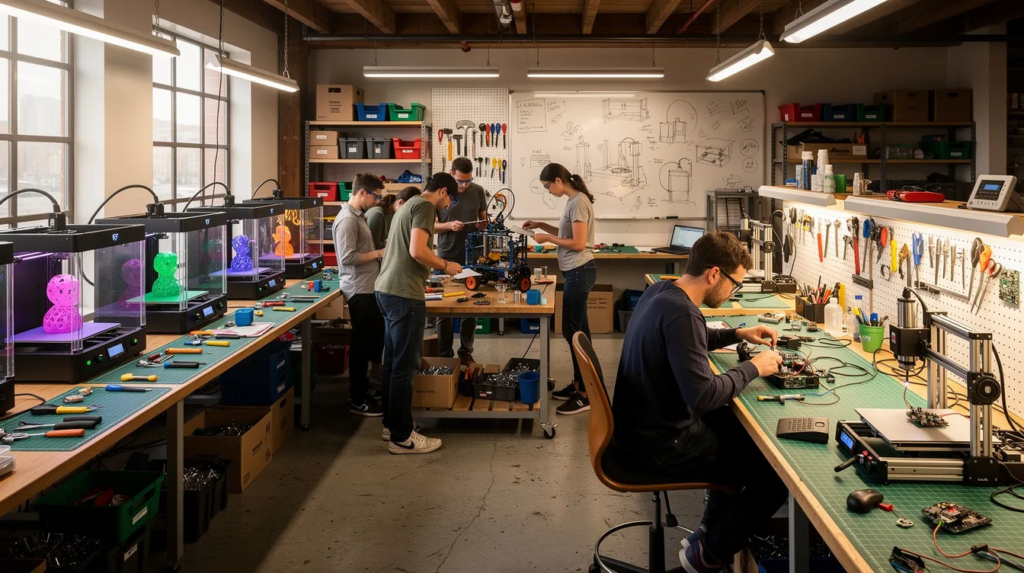
Walk into any thriving makerspace and you’ll notice the hum of 3D printers, the whir of laser cutters, and the focused energy of people building everything from Arduino-powered gadgets to competition-ready robots. The world’s makerspaces have exploded in popularity since around 2010, with nearly 1,400 active spaces worldwide by 2016—a 14-fold increase over the prior decade.
This article is intended for makerspace managers, educators, and community leaders seeking to improve communication and engagement in their creative spaces.
From MIT’s pioneering Fab Labs in the early 2000s to local library makerspaces in cities like Chicago and Austin, these creative hubs have democratized access to professional-grade equipment. University centers like Iowa State’s Student Innovation Center now offer 24/7 access to prototyping tools, while nonprofit community shops welcome hobbyists, artists, and hardware startups alike. But with all this activity comes a familiar challenge: how do you keep everyone informed about machine availability, safety rules, training schedules, and events?
This article explores makerspaces through Split-Flap TV’s lens—focusing on how these dynamic environments can improve communication and atmosphere using digital signage with retro split-flap aesthetics that resonate with the maker ethos.
Key points covered:
- What defines a makerspace and how different types serve various audiences
- Common operational challenges around access, training, and real-time communication
- Why digital signage solves critical information-sharing problems
- How split-flap-style displays connect nostalgia with modern maker culture
- Practical deployment strategies using Split-Flap TV for any makerspace setting
What Is a Makerspace?
A makerspace is a shared, community-oriented workshop where people can design, prototype, and build physical and digital projects using communal equipment. Makerspaces provide access to tools and equipment for hands-on learning and innovation. Unlike traditional labs with formal hierarchies, makerspaces emphasize open, experiential learning and collaborative tinkering across disciplines.
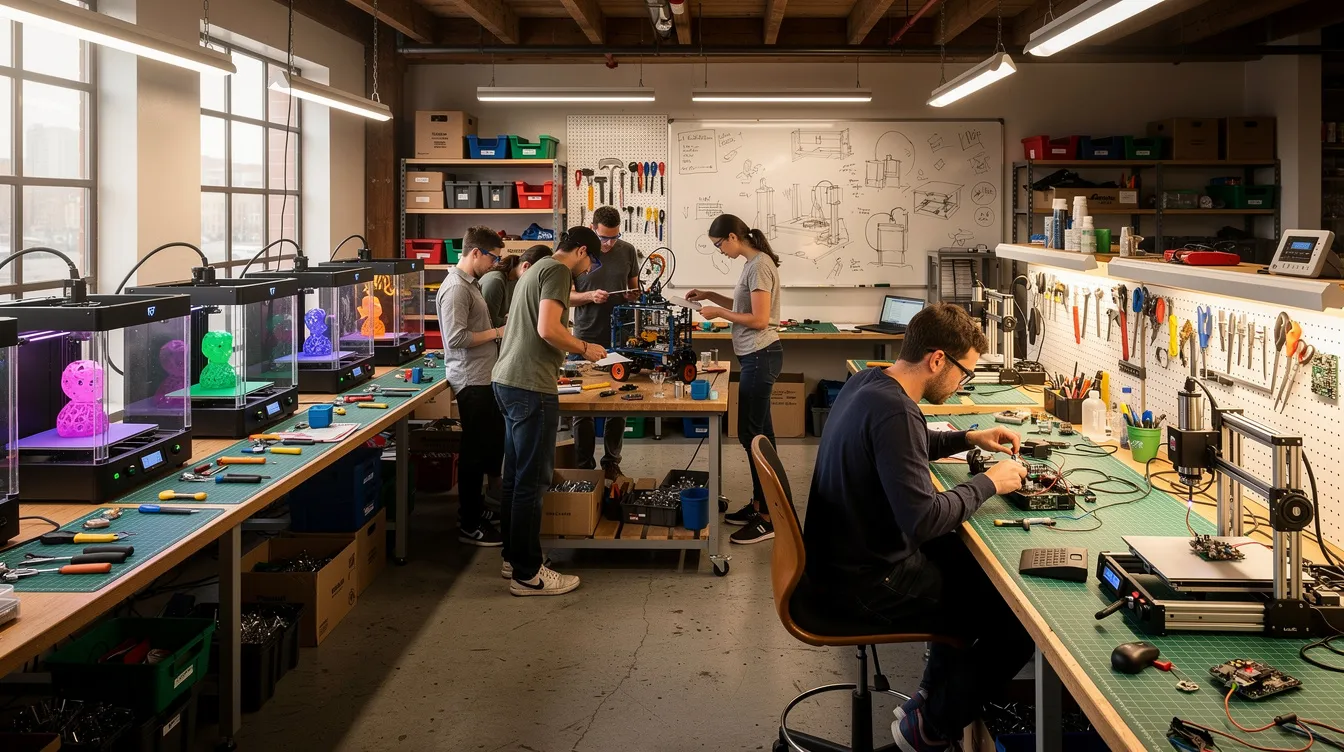
- Definition: Physical spaces fostering invention through shared access to tools and technologies
- Typical zones: Woodshop (table saws, band saws, CNC routers), metal shop (welders, plasma cutters), electronics lab (soldering stations, oscilloscopes), 3D printing farm, textiles area (sewing machines, embroidery equipment), and collaborative coworking desks with computer stations
- Common activities: Arduino workshops teaching sensor integration, CNC furniture builds using CAD software like Fusion 360, cosplay prop fabrication via resin printing and vacuum forming, robotics teams preparing for FIRST Robotics competitions, and hobbyist PCB prototyping
- Campus makerspaces: University hubs like the Student Innovation Center offering certification-based 24/7 access with academic oversight
- Library makerspaces: Public spaces like Chicago’s YOUmedia centers providing free entry-level tools for youth STEM engagement
- Independent shops: Member-based facilities from the 2010s TechShop era charging tiered memberships for industrial-grade equipment
Key Features of Makerspaces
- Makerspaces provide access to tools and equipment for hands-on learning and innovation.
- Makerspaces encourage collaboration and creativity among users.
- Makerspaces can facilitate the development of prototypes and innovative projects.
- Makerspaces typically offer training and consultation for users to learn how to use the equipment effectively.
- Makerspaces often require users to complete safety training before using equipment.
- Makerspaces often operate on a first-come, first-served basis for equipment use.
- Makerspaces can be a valuable resource for small to medium businesses looking to innovate.
Types of Makerspaces and Who Uses Them
Understanding the different categories helps clarify how communication needs vary across settings. Each type serves distinct audiences with unique scheduling, training, and messaging requirements.
University Makerspaces
- Large-scale innovation centers at schools like Iowa State, MIT, and Stanford
- Support capstone projects, research prototypes, and entrepreneurship programs
- Students need clear schedules for equipment reservations, training certification status, and project deadlines
K-12 School Makerspaces
- Curriculum-aligned spaces focused on STEM challenges and hands-on learning
- Teachers and students require simple, visible schedules for class rotations and supply availability
Public Library Labs
- Free or low-cost access emphasizing inclusivity across all ages
- Examples include New York Public Library programs and Austin’s Library Foundation initiatives
- Visitors need intuitive wayfinding and beginner-friendly information about available tools
Nonprofit and Community Shops
- Volunteer-run spaces relying on donations and membership dues
- Members range from hobbyists to local business owners creating signage and prototypes
- Require visible communication about volunteer shifts, donation needs, and community events
Commercial Prototyping Studios
- For-profit spaces targeting hardware startups needing rapid prototyping
- Users demand real-time machine availability and booking confirmations
- These studios often use digital signage to engage customers and improve communication, as customer engagement is crucial for business growth, and an old airport board style display can create a distinctive, memorable atmosphere for visiting clients.
Typical users across all types:
- Engineering and design students iterating on prototypes
- Artists blending traditional crafts with digital tools
- Hardware startups validating MVPs before production
- Educators leading workshops and training sessions
- Hobbyists pursuing personal projects on evenings and weekends
- Families attending weekend workshops and youth programs
Each audience has different needs: class schedules, machine reservations, tool training requirements, safety alerts, and event announcements all compete for attention.
How Makerspaces Work: Access, Training, and Safety
Makerspaces operate through structured access models, rigorous training requirements, and stringent safety protocols designed to protect users from high-powered equipment hazards.
The communication challenge emerges quickly: safety rules evolve after incidents, machines go offline for maintenance, and class times shift based on instructor availability. Information must be updated clearly and in real time—yet many spaces rely on paper signs that fade, whiteboards that get erased incompletely, or email lists that achieve less than 20% open rates.
Access models:
- Keycard or PIN entry systems for 24/7 member access
- Staff-supervised hours (e.g., 9 AM–10 PM weekdays) with trained monitors
- Tiered memberships granting privileges: basic (hand tools), intermediate (3D printers), advanced (laser cutters, CNC equipment)
Onboarding process:
- Mandatory online Environmental Health and Safety training modules (typically 1-2 hours covering general hazards)
- Hands-on equipment checkouts for specific tools (e.g., 30-minute laser cutter sessions verifying alignment and fire safety procedures)
- Liability waivers signed before first use
- Personal protective equipment rules: safety glasses, closed-toe shoes, respirators for machining, ear protection in loud areas
Training and materials policies:
- Many university and library spaces offer free machine time and initial training
- After orientation, users typically bring their own materials (filament, plywood, fabric)
- Session limits (2-4 hours) prevent equipment hogging during peak times
Inside a Makerspace: Tools, Zones, and Projects
The physical layout of a makerspace balances workflow efficiency with hazard isolation. Heavy fabrication areas with CNC routers and welders are typically separated by fire-rated walls from electronics labs and quiet coworking zones. Clear visual communication helps users navigate these spaces safely, and using affordable split-flap boards as digital signage can extend that clarity across zones without sacrificing budget.
A well-designed makerspace might include 3D printers like the Prusa i3 MK3S or Ultimaker S5 arranged in clusters, CO₂ laser cutters capable of slicing through 12mm acrylic, desktop CNC routers for parametric furniture, soldering stations with oscilloscopes and function generators, vinyl cutters for custom decals, embroidery machines for textiles, and VR/AR test areas for immersive prototyping.
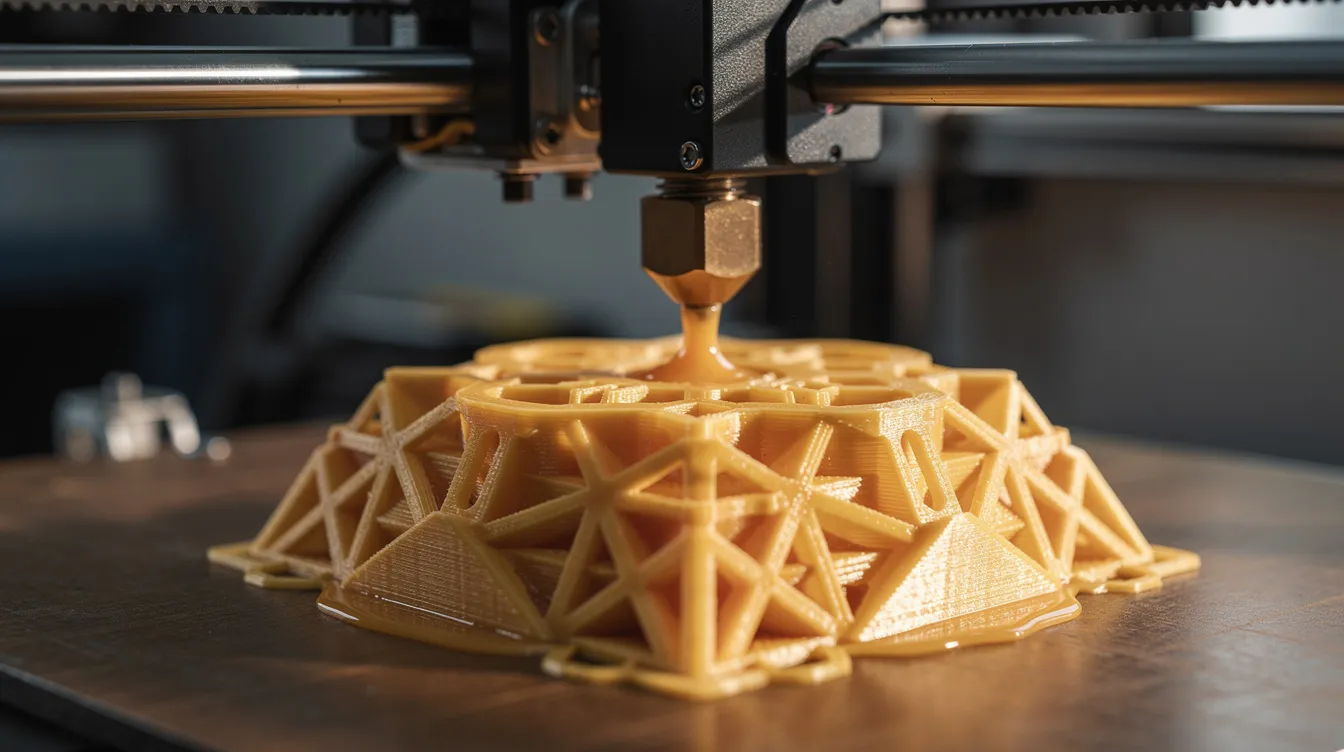
Projects in these spaces run the gamut from practical to fantastical. Students might spend months building autonomous drones for capstone presentations. Hobbyists create DIY split-flap displays using ESP32 microcontrollers, stepper motors, and open-source code from GitHub repositories. Local business owners prototype custom signage. Cosplayers fabricate elaborate props using resin casting and vacuum forming. Robotics teams machine and program competition robots under tight deadlines.
Key tool categories:
- Additive manufacturing: FDM 3D printers, resin printers, laser sintering
- Subtractive manufacturing: CNC routers, mills, laser cutters, plasma cutters
- Electronics: soldering stations, oscilloscopes, Arduino/Raspberry Pi benches, reflow ovens
- Textiles: industrial sewing machines, embroidery equipment, laser cutters for fabric
- Finishing: vinyl cutters, spray booths, heat presses
Example projects:
- IoT prototypes integrating MQTT for remote sensor monitoring
- Custom split-flap displays using components from open-source designs
- Furniture built with parametric CAD and CNC routing
- PCB prototyping with services like JLCPCB or in-house etching
When multiple projects compete for limited equipment, clear scheduling displays become essential. A maker working on an ESP32 project needs to know when the soldering station is free. A team preparing for a robotics competition needs real-time updates on CNC availability.
Communication Challenges in Busy Makerspaces
Running a makerspace means juggling constant operational changes while keeping everyone safe and productive. The daily pain points are predictable but persistent.
Consider these scenarios: A laser cutter goes offline mid-semester for belt replacement, leaving a queue of students with unfinished projects. A PCB design workshop gets rescheduled at the last minute due to instructor illness. A near-miss incident in the woodshop prompts urgent new protection requirements. A hackathon drawing 200+ participants needs promotion across multiple zones.
The problem isn’t lack of information—it’s making sure information reaches people who are wearing ear protection, focused intently on machines, or just walking through on their way to another zone.
Common operational pain points:
- Managing machine reservations across multiple booking systems
- Communicating tool downtime before users plan their sessions around unavailable equipment
- Broadcasting safety alerts immediately after incidents or policy changes
- Promoting events, classes, and workshops to transient populations
- Updating training requirements as new equipment arrives
Fragile solutions that fail:
- Paper notices taped to doors that fade, weather, or get covered by newer notices
- Whiteboards covered with outdated notes from three weeks ago
- Crowded email lists that students ignore or filter to spam
- Slack and Discord channels that not all visitors monitor—especially drop-in users and families
- Verbal announcements that only reach whoever happens to be present
Pre-2018, U.S. makerspaces hosted over 100,000 members collectively. Even a mid-sized space with 100+ daily users faces massive information dissemination challenges. The solution needs to be on-site, always-visible, and capable of real-time updates.
Why Makerspaces Benefit From Digital Signage
Digital signage solves the visibility problem by placing always-on displays in high-traffic areas: lobbies, hallways, and shop entrances where everyone passes. Unlike paper or whiteboards, a digital signage network can update instantly and rotate through multiple messages without staff manually swapping signs, and modern split-flap-style digital signage is making a comeback in many spaces.
Makerspaces already embrace screens for CAD tutorials, code editing, and design software. Adding centralized signage is a natural extension of the existing tech stack—not a foreign element.
Practical uses for makerspace signage:
- Daily class schedule with room locations and instructor names
- Live machine availability status by zone
- Safety status board (e.g., “Laser Lab: RED / Closed until 3:00 PM”)
- Upcoming hackathons, demo days, and community events
- EHS reminders and PPE requirements by area
- Member project spotlights and completion announcements
- Sponsor acknowledgments and grant funder recognition
Example setup: A 55” TV mounted at the main entrance cycles through room status for each zone, displays the instructor currently on duty, shows emergency procedures, and promotes the next weekend workshop—all without requiring anyone to update a whiteboard.
Split-Flap Aesthetics: Nostalgia Meets Modern Makerspaces
There’s a reason makers get excited about mechanical displays. The classic split-flap boards from 1960s-1980s airports and train stations—like the iconic Solari boards at JFK with their 28-character flaps clicking at 6-8 flips per second—represent a different way of thinking about information display and reflect the broader history and evolution of split-flap displays.
These boards embody visible logic. You can see how they work. The flaps rotate through characters in sequence, each click representing a mechanical action with clear cause and effect. For makers who value tangible engineering, industrial design, and mid-century aesthetics, this sound and motion captures attention in ways that sterile LCD slideshows never can.
Imagine walking into a makerspace lobby and seeing rows of flapping characters announce “LASER LAB TRAINING 14:00” or “CNC ROUTER OPEN BENCH 19:00–21:00.” The message isn’t just displayed—it arrives with ceremony. Each letter flips into place, drawing the eye and creating a moment of anticipation.
This matters because generic TV slideshows blend into the background. A styled split-flap board immediately grabs attention and fits the creative, industrial vibe that defines maker culture. It’s functional art that belongs in a space where people build things.
Aesthetic and functional advantages:
- Visual kinetics that demand attention unlike static screens
- Industrial character matching workshop environments
- Nostalgic appeal to makers interested in mechanical systems
- Clear typography optimized for quick reading at a distance
- Customizable messages that feel intentional rather than corporate
How Split-Flap TV Fits Makerspaces
Split-Flap TV is subscription-based software that turns any TV, tablet, or digital signage screen into a virtual split-flap board. The platform runs via apps for Android TV, Apple TV, or through small media player devices connected via HDMI, all configured through an intuitive interface in your browser, making it a flexible retro communication platform for managing split-flap-style messages.
Typical makerspace deployment:
- Wall-mounted smart TVs at shop entrances and common areas running the Split-Flap TV app
- Configuration via a browser-based dashboard accessible from any computer or phone
- Content managed by staff without technical expertise required
Makerspace use cases:
- Rotating messages for open hours and zone availability
- Safety rules and EHS reminders displayed throughout the day
- Upcoming classes with times and instructor names
- Project demos during showcase events
- Sponsor and grant funder acknowledgments
- Countdowns to hackathons or competition deadlines
Integration capabilities:
- Current date and time displayed automatically
- Local weather data (e.g., weather for Ames, IA showing “Sunny, 72°F”)
- Social media follower counters for the makerspace’s Instagram or Discord community
- Scheduled content playlists for busy weeks like end-of-semester showcases
Subscription options:
- Economy tier for basic single-screen deployments
- Business tier for multi-screen sync across locations
- Cockpit tier for advanced integrations
- 7-day free trial allowing makerspaces to prototype their signage setup during a single workshop week
Practical Use Cases: From Shop Status to Showcase Walls
Building effective signage means creating content playlists that serve different communication goals throughout the day. A makerspace might organize playlists around themes that rotate automatically.
Sample playlist categories:
- “Today’s Trainings” – Workshop titles, times, room numbers, and instructor names
- “Machine Status” – Real-time availability showing OPEN, IN USE, or MAINTENANCE
- “Safety Spotlight” – Daily PPE reminders, recent policy updates, emergency procedures
- “Member Projects” – Names, descriptions, and completion dates for finished work
- “Events & Hackathons” – Upcoming competitions, demo nights, and community gatherings
Example rotation: Every 30 seconds, the display flips between lab open/closed states, current workshop titles with times, and a countdown to the monthly demo night. The dynamic content keeps the screen interesting while ensuring critical information reaches viewers.
Scenario: Demo Day 2026 Student teams reveal their capstone projects on a split-flap board during the annual showcase. Each project name flips in sequence on a large TV in the atrium—“AUTONOMOUS DRONE / TEAM CYCLONE,” followed by “SPLIT-FLAP CLOCK / MAKER CLUB,” then “IOT GARDEN MONITOR / GREENHOUSE TEAM.” Visitors gather to watch the board, creating a natural conversation starter about each project.
Content ideas:
- Photos of finished projects presented within the split-flap interface
- Quotes from makers about their learning experience
- Links to GitHub repositories or project pages displayed as URLs
- Acknowledgment of supplies donated by local companies
Real-Time Information and Data Integration
Split-Flap TV can pull live data points that matter to makerspaces: time, date, weather feeds, and social metrics. Real-time updates ensure information stays current without manual intervention.
Consider how immediate changes help operations: room reservations update as bookings happen, the display highlights when a supervisor is on duty, or live social media posts appear during events. This keeps the board relevant and reduces the gap between what’s true and what’s displayed.
Future-oriented possibilities:
- Integration with common tools makers use (Google Sheets for class rosters, basic APIs for booking systems)
- Pulling data from scheduling platforms like Calendly
- Connecting to equipment monitoring for automated status updates
Concrete example: A community makerspace in 2026 runs a dashboard that updates every minute. Each zone shows “OPEN,” “AT CAPACITY,” or “MAINTENANCE” in split-flap style. When the laser cutter goes down for cleaning, the status flips automatically. When capacity limits are reached in the woodshop, the board updates before anyone walks over to discover a full room.
Data integration benefits:
- Eliminates manual updates for routine status changes
- Reduces confusion about current availability
- Connects the physical space to digital scheduling systems
- Creates a single source of truth visible to everyone
Operating Systems: The Backbone of Makerspace Displays
Operating systems emerge as the quiet, elegant foundation—the unsung architects behind every makerspace’s digital storytelling network. Whether you’re crafting a single screen for intimate project showcases or orchestrating as many displays as your creative space demands, the right operating system becomes the invisible artisan, weaving together reliable, flexible, and beautifully scalable digital experiences. Makerspaces discover a kind of technical poetry in platforms like Windows, Android, Linux, Mac, and Chrome OS—each offering its own aesthetic character, its own refined approach to different hardware personalities and the unique creative spirits of their users.
With these thoughtfully robust operating systems, makerspaces experience the pure joy of seamless installation—watching free digital signage software come alive across a symphony of devices, from the elegant simplicity of smart TVs to the focused precision of dedicated media players. This flexibility creates something almost magical: teams connecting multiple screens across local networks like neurons firing in a creative brain, ensuring that dynamic content flows with intention—created with care, managed with finesse, and delivered with purpose to audiences throughout the space. Whether you’re celebrating the wonder of student innovations, broadcasting essential safety wisdom, or weaving anticipation for upcoming community gatherings, a thoughtful operating system ensures your software performs with grace and your message reaches every corner with warmth.
For both purposeful business applications and boundless creative expression, operating systems empower makerspaces to orchestrate and breathe life into content across devices—managing updates with remote precision, supporting an endless spectrum of projects with quiet confidence. The result? A seamless, professionally crafted digital signage experience that feels both intentional and alive—keeping your community not just informed, but genuinely inspired and emotionally connected to the creative pulse of your space.
Free Digital Signage Software for Makerspaces
Free digital signage software is absolutely transforming how makerspaces communicate—offering this kind of magical, accessible way to create, manage, and deliver content that feels alive and dynamic. With these wonderfully intuitive interfaces and user-friendly features that just make sense, these platforms create this beautiful moment where anyone—regardless of their technical background—can design engaging displays that truly capture attention and create those “wow” experiences for guests.
Makerspaces can use free digital signage software to promote events with real excitement, highlight member projects in ways that feel celebratory, share important safety messages that actually stick, and even create these heartwarming moments celebrating community achievements. The ability to customize content and schedule playlists means your screens always pulse with the energy of what’s happening in your space—they become this living, breathing reflection of your community. Plus, managing multiple devices feels surprisingly straightforward, allowing you to reach audiences in every corner of your makerspace with this cohesive, purposeful presence.
Beyond communication, using digital signage software becomes this incredible opportunity for members to dive into new skills—content creation, digital media, technology management—in ways that feel hands-on and inventive. Whether you’re running a single screen that becomes a statement piece or orchestrating a network of displays that create atmosphere throughout your space, free digital signage software empowers your team to deliver results that feel genuinely professional and impactful—all without breaking the budget. It’s become this essential tool for any forward-thinking makerspace that wants to create meaningful, tactile experiences for their community.
Related reading: Coworking Spaces: How Shared Offices and Split-Flap Style Displays Transform Modern Work
Mechanical Components of Split-Flap Displays
The magic of split-flap displays lies in their mechanical poetry—a beautiful marriage of craftsmanship and engineering that breathes life into information in the most enchanting way. At the heart of each display are thoughtfully crafted components: lovingly laser-cut modules, precision-engineered flaps that dance with purpose, and carefully positioned sensors that feel almost intuitive. Makerspaces become sanctuaries for exploring these elements, where tools like laser cutters transform raw materials into something that feels genuinely alive, especially when you consider the broader history and evolution of split-flap display boards from early electromechanical signs to today’s digital reinterpretations.
Building a split-flap display is a deeply satisfying journey that nurtures the soul while developing meaningful skills in design, fabrication, and assembly. Each flap settles into place with that distinctive, almost musical click—creating dynamic content that’s both visually mesmerizing and profoundly fulfilling to witness. The modular nature of these displays means they become as personal and expressive as the makers who lovingly craft them, tailored to carry any message, celebrate any moment, or bring any creative vision to life.
By weaving together mechanical components with digital signage software, makerspaces can create displays that don’t just inform—they captivate hearts and spark genuine wonder. It’s an opportunity for members to learn, create, and share their work in a format that feels refreshingly human, one that honors the timeless beauty of mechanical motion while celebrating the passionate spirit of making something extraordinary with your own hands.
Electronic Components: Bringing Split-Flap Displays to Life
While the mechanical choreography captures hearts and minds, it’s the hidden electronic symphony that transforms split-flap displays into something truly magical — sensors, microcontrollers, and thoughtfully chosen components working in perfect harmony to orchestrate every gentle flip, every synchronized moment, every delightful surprise that makes visitors pause and smile. These electronic guardians don’t just manage movement; they breathe life into each display, creating those precious moments of wonder that connect people to something beautifully tactile and refreshingly human.
With the right electronic heart beating inside, makerspaces can weave their split-flap displays into the digital fabric of their community — connecting to computers and networks that feel less like technology and more like creative collaboration. Features like video tags, ambient sound effects, and thoughtful scheduling become extensions of the maker’s imagination, transforming static information into living, breathing communication that speaks to both the curious child and the seasoned engineer. These electronic components don’t just function; they invite exploration, spark conversations, and offer makers a chance to develop skills that feel as rewarding as they are valuable.
By embracing this beautiful dance between hardware and software, makerspaces can craft split-flap displays that transcend mere functionality — they become storytellers, mood-setters, and inspiration generators that welcome every visitor with a gentle mechanical whisper and the promise of discovery. This is where information meets emotion, where technology feels human, and where every flip carries the potential to create those rare, wonderful moments that linger long after someone walks through the door.
Controlling the Display: From Code to Clicks
Managing a digital signage display in a makerspace feels like orchestrating a beautiful dance between human creativity and mechanical precision. Whether you’re nurturing a beloved split-flap board with its satisfying mechanical whispers or breathing life into a modern digital signage network, the journey begins with choosing tools that feel as intentional as they are functional—software that responds to your vision and hardware that becomes an extension of your creative spirit.
Connecting these displays to a local network creates something almost magical—a unified heartbeat that pulses through your space, allowing you to craft experiences with the warmth of human touch. You can refresh menus with the satisfaction of a curator arranging an exhibition, rotate project highlights like pages in a living story, or share urgent messages that ripple through your community with just a few purposeful clicks. The software becomes your creative companion, making each interaction feel meaningful and every display moment intentional—whether you’re cultivating a thriving business, nurturing educational dreams, or celebrating the personal projects that make hearts sing.
With dashboards that welcome even the most hesitant newcomers like old friends, digital signage transforms from intimidating technology into an accessible canvas for expression. Anyone can learn to shape content with care, schedule playlists that tell stories, and monitor their displays with the gentle attention of a gardener tending plants. This empowers makerspaces to deliver not just information, but genuine human connection—building skills that blend software mastery, hardware appreciation, and the timeless art of bringing people together. From the first line of code to that satisfying final click, controlling your display becomes the beating heart that transforms your makerspace into a living, breathing hub where creativity and communication dance together in perfect harmony.
Hardware Setup: Screens, Media Players, and Layouts
Most makerspaces already have the hardware they need. Wall-mounted TVs used for tutorials, project displays, or monitoring can double as signage screens. The platform runs on common smart TV operating systems and small media player devices connected via HDMI.
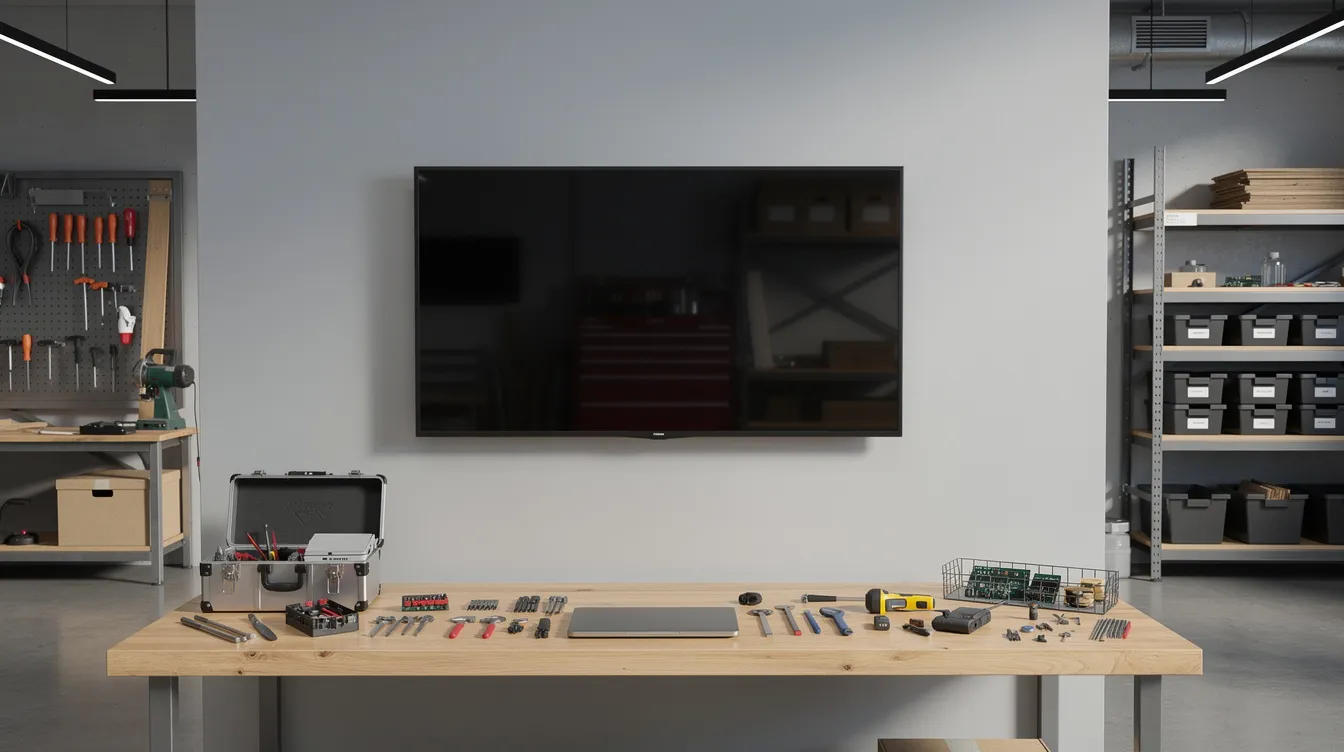
Hardware makerspaces typically have:
- Wall-mounted 43–65” TVs in common areas and lobbies
- Ultra-wide signage like 86” stretch displays in large atriums
- Small tablets at doorways for zone-specific information
- Affordable Android media player devices (as inexpensive as $30 Fire Sticks)
Placement strategies:
- One main board in the lobby capturing all foot traffic
- Smaller boards at each lab entrance with zone-specific status
- “Quiet mode” versions near study areas showing text without animation
- Synchronized displays on multiple floors showing consistent information
Example layout: A 3-screen setup in a 2-floor university makerspace places one screen at the main entrance, one on the second floor near the electronics lab, and one in the fabrication wing. All three run from the same account, synchronized to show consistent information while allowing zone-specific content on each.
Hardware checklist:
- Inventory existing screens and their locations
- Identify power and mounting options for new installations
- Choose media player devices compatible with the platform
- Plan cable management in workshop environments
- Consider screen protection in dusty or high-traffic areas
Content Planning and Scheduling for Makerspaces
Building a content calendar transforms ad-hoc signage into a professional communication system. Split-Flap TV’s scheduling tools support recurring safety reminders, fixed weekly class slots, and one-off event promotions.
Planning timeline example: Fall 2026 semester
- August: Orientation week content welcoming new members, basic safety overviews, tour schedules
- September-October: Regular class schedules, tool certification sessions, workshop promotions
- November: Midterm project review announcements, hackathon countdown
- December: Final showcase preparation, project submission deadlines, holiday closure notices
Best practices:
- Keep messages short—one or two lines maximum for quick reading
- Use consistent naming conventions for rooms and tools across all content
- Rotate between safety, logistics, and inspirational content to maintain interest
- Schedule recurring content (daily safety reminders, weekly training sessions) to run automatically
- Plan one-off content for special events well in advance
Sample content categories:
- “Tool of the Week” – Highlighting underutilized equipment with tips for getting started
- “New Member Orientation” – Welcome messages with links to training sign-up
- “Funding & Sponsor Thank You” – Acknowledging grant funders and donors
- “Safety Reminder” – Rotating PPE requirements and emergency procedures
- “Community News” – Member achievements, competition results, media coverage
Engagement: Inspiring Makers and Building Community
A split-flap-style display can become more than signage—it can serve as a cultural object in the makerspace. Like a central information hub, people gather to see what’s happening this week, discover new skills to explore, and connect with fellow makers.
Showcasing member projects transforms the board into a celebration wall. Names, short descriptions, completion dates, and links appear in rotating sequences that feel like classic departure boards announcing arrivals, echoing the nostalgic charm of split-flap displays in modern spaces. The form matters: information delivered with ceremony creates community moments.
Community engagement ideas:
- Social counters showing Instagram followers and YouTube subscribers ticking up
- Event countdowns building anticipation for demo nights and local Maker Faires
- “Member Spotlight Friday” featuring one maker’s project on the board throughout the day
- Recognition walls for teams who collaborate on competition entries
- Welcome messages for guest visitors during open house events
Example: Member Spotlight Friday Every Friday, one maker’s project appears on the lobby board: “MAKER FRIDAY: JANE’S ESP32 DRONE / GITHUB: /user/repo.” The project name flips into place at 8 AM and remains throughout the day, sparking conversations and encouraging others to share their work.
This kind of visibility creates feedback loops. When makers see their projects celebrated publicly, they’re more interested in participating. When visitors see the community’s output, they understand what’s possible. The display becomes a living portfolio for the entire space.
Cost, Subscriptions, and Why SaaS Works for Makerspaces
Makerspaces often operate on tight budgets, especially nonprofit and library spaces recovering from post-2017 challenges. A subscription model offers predictable costs without large upfront investments.
Split-Flap TV subscription context:
- Low monthly fee per screen or account
- Tiers match different budgets: Economy for small community shops, Business for mid-sized spaces, Cockpit for large university centers with advanced needs
- 7-day free trial allows staff to test signage during a real week of classes and events
SaaS vs. DIY signage comparison:
- Custom Raspberry Pi setups require ongoing maintenance, image updates, and troubleshooting
- Hardware split-flap installations can cost $5,000+ per board plus maintenance
- SaaS platforms handle updates, uptime, and support while staff focus on creative work
- Reusing existing TVs and adding a $30 media player is usually cheaper than any hardware alternative
Cost-benefit considerations:
- Existing screens eliminate the largest hardware expense
- Staff time saved on updating paper signs and whiteboards
- Reduced confusion translates to fewer missed trainings and better equipment utilization
- Professional appearance enhances guest experience for visitors, funders, and prospective members
Getting Started: A 5-Step Plan for Your Makerspace
Standing up a basic digital signage system takes less time than most makers expect. With screens already in place, a small team can deploy Split-Flap TV in under one afternoon by following a step-by-step guide to getting started with Split-Flap TV.
Step 1: Inventory existing screens
- List all TVs and monitors currently in the space
- Note sizes, locations, and current uses
- Identify screens available for signage duty
Step 2: Choose locations
- Prioritize high-traffic areas: main entrance, lobby, zone doorways
- Consider visibility and reading distance
- Plan for as many screens as needed to cover key zones
Step 3: Sign up for Split-Flap TV’s free trial
- Create an account through your browser
- Install the app on your smart TV or connect a media player
- Access the dashboard to manage content
Step 4: Create initial playlists
- Start with essentials: hours, safety reminders, upcoming events
- Add machine status messages for key equipment
- Schedule recurring content for daily and weekly rotation
Step 5: Gather feedback
- Run a pilot period during a quieter month (2-3 weeks recommended)
- Ask staff and members what information they need most
- Refine playlists based on real usage patterns
Recommended approach: Start small with one lobby screen. Test the workflow, gather feedback, and expand to zone-specific boards once the system proves valuable. Roll out before a busy semester or major public event to maximize impact.
Conclusion: Makerspaces as Living, Flipping Idea Boards
Makerspaces are dynamic environments where information changes constantly. Machine availability shifts throughout the day. Training schedules adjust for instructor availability. Safety requirements update after incidents. Events compete for attention. In this world, clear, real-time communication isn’t optional—it’s essential for keeping operations running and members safe.
Digital split-flap signage combines nostalgia, clarity, and flexibility in a way that fits the maker ethos. The aesthetic resonates with people who value visible engineering and industrial design. The functionality delivers what paper signs and cluttered whiteboards cannot: always-current information that captures attention and reaches everyone in the space.
If you manage a makerspace—whether a university innovation center, a library lab, or a community workshop—consider how split-flap-style displays might transform your communication flow. Start with Split-Flap TV’s 7-day free trial during your next workshop cycle, semester, or community build sprint. One screen in your lobby might be all it takes to discover a different way of keeping your community connected and informed.