Image overlays, and how to size them
Put your own artwork over the board. A graphic in one corner, or a full-screen image turned down so the text still reads through it.
Available on the Business plan and up
An overlay is your own image sitting on top of the board while the flaps keep flipping underneath. It is how a board stops looking like a generic display and starts looking like yours, without touching a single line of the text.
Start with the easy one. A graphic in a corner, along the bottom, or down one side: a logo, a header strip, a bit of colour that matches the room. The picture is mostly empty, around ninety per cent transparent, and only the part you want to see is filled in. The board shows through everywhere else, so nothing you have written is hidden and you can leave the same overlay in place while the content changes underneath it all day.
Once that is working, the more ambitious version is a full-screen image. Instead of clearing most of the picture, you take the whole thing and turn its opacity down, commonly to somewhere around forty to sixty per cent transparent. The image covers the entire board and the flaps read through it, so you get a photograph and your text in the same frame rather than one or the other. It is the difference between a board with a logo on it and a board that looks designed.
So there are three kinds of image in play, and it is worth knowing which one you are making. A normal overlay is mostly empty, roughly ninety per cent transparent, with artwork in one area. A full-screen overlay covers everything and is turned down to around forty to sixty per cent so the board shows through. A picture board is a different thing again: the image is the content rather than a layer over it, and that has its own page.
Sizing is the part that catches people out, and it is simpler than expected. Design the image at exactly the size of the screen it will run on. For a full HD TV that is 1,920 by 1,080 pixels. Match the screen and every edge lands where you drew it.
Overlays must be PNG, because PNG is the format that carries transparency. A JPG has no transparent areas at all, so it arrives as a solid rectangle and hides the board completely. Picture boards can be PNG or JPG, since nothing needs to show through them.
If your image is bigger or smaller than the screen it will still work, it just gets stretched to fit. Nothing breaks. But anything you positioned carefully moves, and a logo drawn crisply at the wrong size arrives soft, which is why matching the screen is worth the two minutes.
- ✓Design at the size of the screen, 1,920 by 1,080 for a full HD TV
- ✓Overlays must be PNG. A JPG has no transparency and hides the board
- ✓A simple overlay is around 90% empty, with artwork in one area
- ✓A full-screen overlay covers everything at roughly 40 to 60% transparent
- ✓Wrong size still works, it stretches, but placement and sharpness suffer
Where Image overlays works best
The same feature adapts to lots of spaces, here are the most popular ways people use it.
Your logo in the corner
One mark in one corner, left in place while the board content changes all day.
A header strip
A title band across the top so the board reads as a named menu rather than a list.
Brand colour down one side
A block of your colour on one edge, tying the screen to the room it is in.
A photograph behind the text
A full-screen image turned down so the flaps read straight through it.
Seasonal dressing
Swap the overlay for a holiday or a campaign without retyping the board.
Event branding
A sponsor mark or an event logo over a board that is already doing its job.
Live in a few taps.
-
01
Pick the size
Match the screen. 1,920 by 1,080 pixels for a full HD TV.
-
02
Draw on a transparent background
Leave everything you want the board to show through as empty, not white. White is not transparent.
-
03
Turn the opacity down, for a full-screen image
Around 40 to 60% transparent so the flaps stay readable underneath.
-
04
Export as PNG
PNG keeps the transparency. JPG discards it and the board disappears behind a solid rectangle.
-
05
Upload it to the board
Add the overlay in the app and it sits over the flaps while the content keeps updating.
Good to know.
Download one and try it.
Ready-made overlays at the right size. Download, upload to a board and see how it sits before you design your own.

Side panel overlay
A colour block down the left edge with a photograph and room for a heading. 1,920 by 1,080, PNG.
Download PNG, 478 KB ↓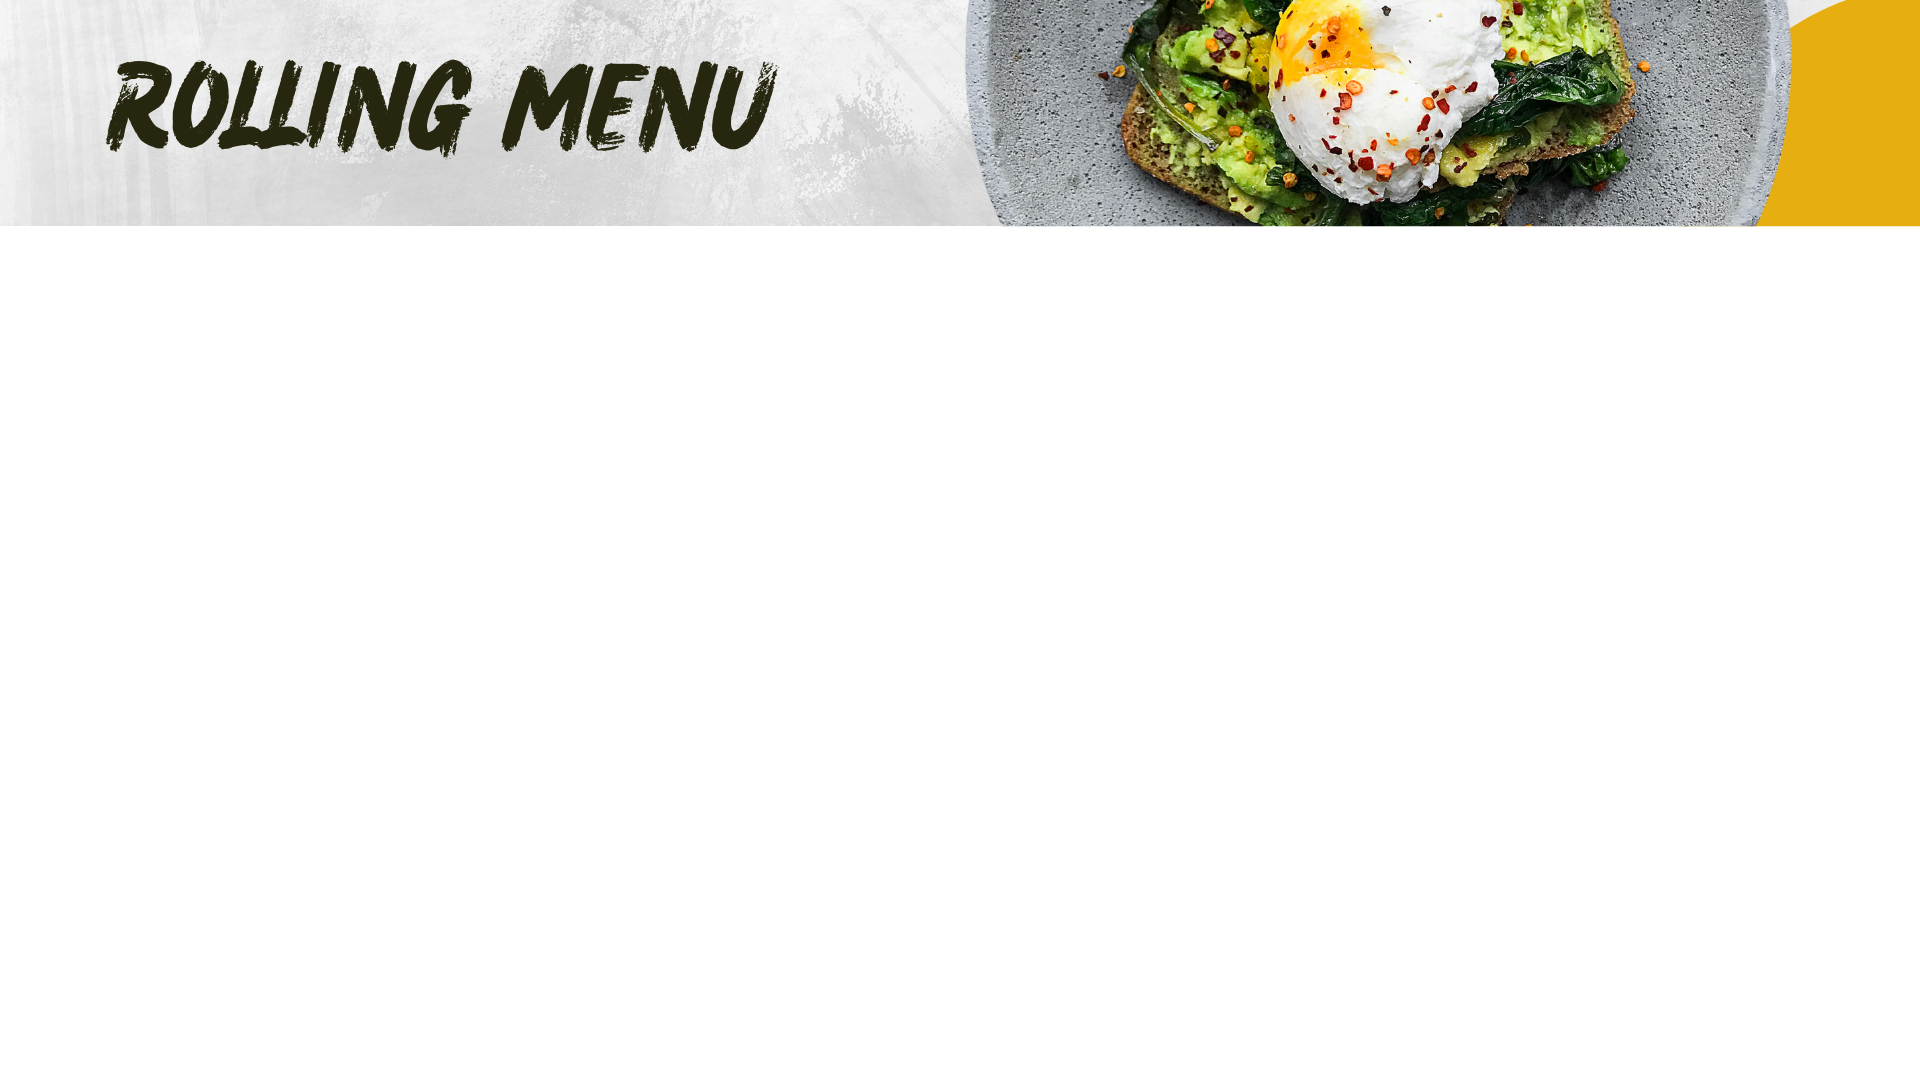
Rolling menu header
A title band across the top reading ROLLING MENU, leaving the whole board below it clear. 1,920 by 1,080, PNG.
Download PNG, 702 KB ↓Real photos on a split-flap board
Upload a real photo or logo and the board slices it across the flaps and flips it into place. Your brand on the wall, not just your words.
View →Custom colours for every line
Pick the colour of each line of your board. Match your brand, highlight a price, or set a mood, with an unlimited palette.
View →Split-flap menu boards
Daily menus and price lists that flip into place, update from your phone, no reprinting.
View →Get the board. Skip the hardware.
7 days free, no card. Then pick the plan you love.