Printed menus get stained, chalkboards need rewriting, and that paper list taped to the wall does nothing for your brand. A TV menu board solves these problems by turning any flat-panel screen into a dynamic display for your menu, prices, and special offers. Whether you run a small café, a busy bar, or a quick-service restaurant, setting one up takes less effort than you might think.
To create a TV menu board, you’ll need three main components: TV screens, a media player, and digital signage software. Digital signage software enables users to manage and distribute content to one or more playback devices. Playback devices manage the storage, processing, and transmission of multimedia content to digital signage displays. These components form the essential parts of a digital signage system and are required to set up and operate your menu board effectively.
Digital signage software enables users to manage and distribute content to one or more playback devices. Its role is to let you control what appears on your screens, update content remotely, and schedule different menus or promotions throughout the day.
This guide walks through everything you need to know about how to make a menu board on TV—from choosing the right hardware to comparing three content methods: USB slides, general digital signage software, and the nostalgic split flap display approach offered by Split-Flap TV.
What is a TV menu board (and how to set one up fast)
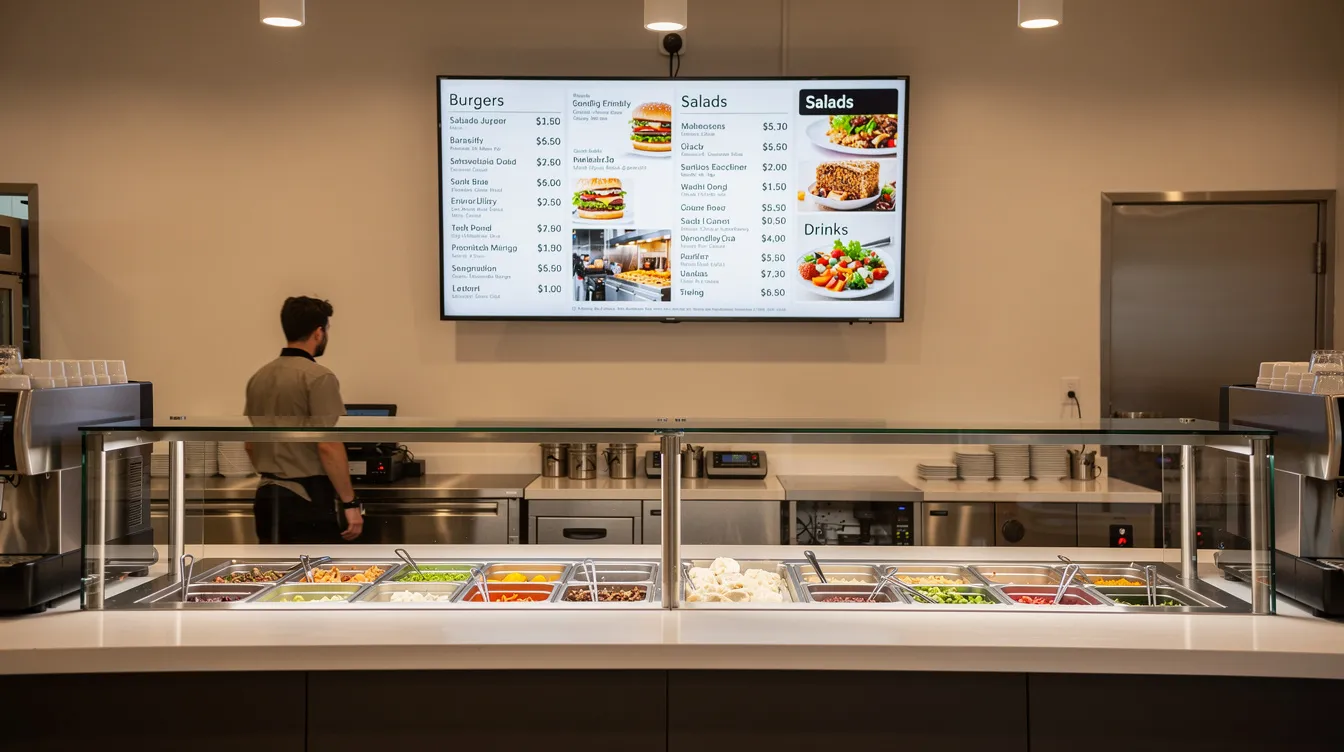
A TV menu board is simply a TV mounted in your venue that shows your restaurant menu, prices, and specials instead of a printed board or chalkboard. Many businesses already have televisions in their space for sports or entertainment; repurposing one for menus requires minimal extra investment.
To get started, you typically need three main components: a TV screen, a way to get content onto it (USB stick, media player, or built-in smart TV app), and some kind of software or images to display. The setup process itself can happen in under an hour once you have your hardware in place. Digital menu displays make it easy to update content by simply entering a new product or deleting an old one.
Most quick service restaurants and coffee shops use two or three screens for their digital menu boards.
Here is the rapid 5-minute overview of the basic process:
- Mount your TV where customers will see it while deciding or ordering
- Connect to power and Wi-Fi (if using digital signage)
- Choose your content method: USB images, casting/apps, or a dedicated signage solution
- Load a draft menu and test readability from where customers actually stand
- Adjust font sizes, contrast, or screen position based on what you observe
This guide compares three main approaches to filling that screen with your menu, including modern split flap display boards that actually work:
- USB stick with menu images — The simplest, cheapest method for static menus
- Regular digital signage software — Cloud-based tools that deliver seamless digital signage solutions with scheduling and remote updates
- Split-Flap TV — A nostalgic, retro-style option that revives classic split flap display boards on modern screens
Choosing and Setting Up Your TV Menu Board
Choosing the right TV for your menu board
Most restaurants and bars use between one and three TVs for their menu displays. The ideal size depends on your space and viewing distance. A 43-inch TV works well above a small bar or coffee counter where customers stand 2-3 meters away. Quick-service restaurants with deeper queues often use 50-55 inch screens, sometimes placing three or four side by side to show the full menu plus promotional content.
Digital menu board TVs start at around 32-34 inches, which is quite normal for many venues.
Resolution matters more than you might expect. At minimum, aim for Full HD (1920×1080), but 4K (3840×2160) is increasingly standard and ensures that even small prices remain crisp from 2-4 meters away. When customers squint at your board, they slow down the line and ask clarifying questions—or worse, skip items entirely.
Key buying criteria to consider:
- Size: Match screen diagonal to viewing distance; 40-55 inches covers most small-venue needs
- Resolution: 1080p minimum, 4K preferred for sharp text
- Brightness: 300-400 nits works indoors; bright storefronts may need 500+ nits
- Orientation: Landscape suits combo meals and photos; portrait works for tall beer or coffee lists
- Smart vs non-smart: Smart TVs (Samsung Tizen, LG webOS, Android TV) can run signage apps directly; non-smart TVs require an external media player via the HDMI port. Digital signage software supports a wide range of operating systems, including Android, Windows, Linux, iOS, webOS, Tizen, ChromeOS, and macOS, providing flexibility for different hardware setups.
- Commercial vs consumer: Commercial displays handle 12-16 hours daily and include better warranties, but many small venues successfully use consumer Samsung, LG, or Sony smart TVs bought since 2020
Display devices are the most prominent components of a digital signage system and come in various technologies such as LCD, LED, and OLED formats.
Mounting and positioning tips
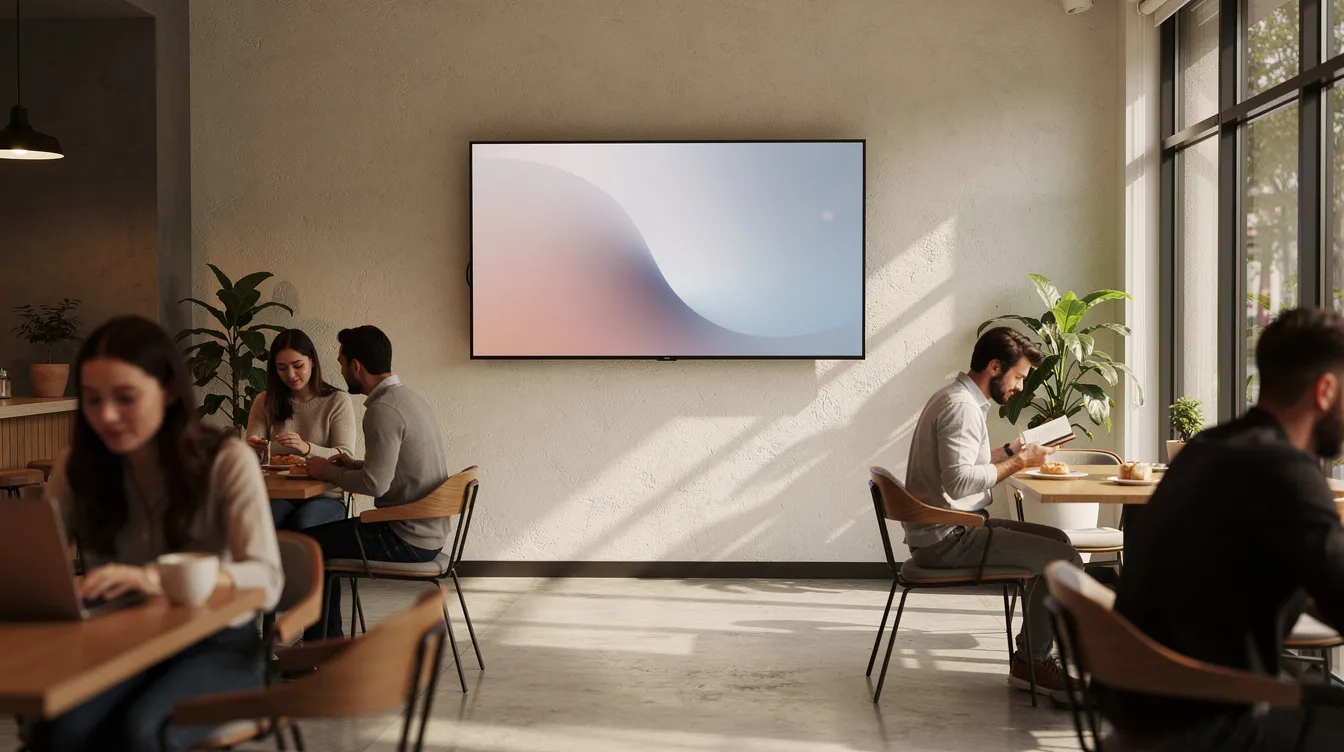
Where you place your TV affects readability as much as what appears on the digital screen. The goal is to position it where every customer in the ordering area can see the menu clearly, without craning their necks or squinting.
Mount the TV slightly above eye level—center of screen roughly 1.7 to 2.2 meters from the floor. This height lets people in line see over each other’s heads while keeping the display comfortable to view.
Here are practical positioning tips that apply to cafés, bars, and fast-casual restaurants:
- Use a tilt or full-motion wall mount to angle the screen toward viewers and reduce glare from windows, pendant lights, or back-bar fixtures
- Plan power and cable routing before mounting so no dangling HDMI or power cables are visible to guests; run cables inside walls or use trunking
- Test visibility with real content: display a draft menu, then stand at the furthest ordering point and check if the smallest prices are easily readable
- Ensure consistent alignment if using multiple screens; misaligned TVs look sloppy and distract from the menu itself
- Consider portrait orientation for tall lists like tap beers or espresso drinks—many mounts support 90-degree rotation
Option 1: Use a USB stick with menu images
Nearly all modern TVs from major brands—LG, Samsung, Sony, TCL, Hisense—include a USB port and built-in media player capable of displaying static images in a loop. These TVs can play your menu board content as a slideshow, making it easy to engage customers with dynamic displays. If your TV was manufactured between 2018 and 2025, it almost certainly supports this feature.
The workflow is straightforward:
- Design your menu slides in PowerPoint, Canva, or Google Slides
- Export each slide as a JPG or PNG image at 1920×1080 (or 3840×2160 for 4K) Note: When using digital signage software, you can upload your files from various sources, including your computer, Dropbox, and Google Drive.
- Copy the files to a USB flash drive (8-16 GB is plenty)
- Plug the USB stick into your TV’s USB port
- Select the USB source and choose “Photo Slideshow” or similar mode
- Configure slide duration (10-15 seconds is common) and set it to loop
- Test readability from the customer’s viewpoint and adjust designs if needed
For example, a small coffee shop with a single 43-inch TV could create three clear images: one for coffee drinks, one for pastries, and one for lunch specials. These cycle every 15 seconds, giving customers time to absorb each category while waiting in line.
Advantages of the USB-stick method
This approach appeals to venues with tight budgets and menus that rarely change. Here are the main benefits:
- Ultra-low cost: You only need the TV and a basic USB flash drive (a 16 GB stick costs under $10 in 2024-2025)
- No internet required: Everything runs locally from the stick, which is helpful in venues with unreliable connectivity or restricted local network access
- Simple operation: Once configured, the slideshow loops automatically whenever the TV powers on
- No subscription fees: Unlike digital signage solutions, there is no monthly cost
- Ideal for static menus: Bars with the same beer list for months or diners with fixed daily dishes benefit most
Disadvantages of using a USB stick for TV menus
After a few weeks of running USB-based menus, several pain points become obvious:
- Cumbersome updates: Every price change or new item requires editing the original file, re-exporting the image, copying to the USB stick, and sometimes reconfiguring the TV’s slideshow settings
- Lost settings after power cuts: Many TVs do not preserve slideshow configuration after overnight shutdowns or outages, forcing staff to reselect the USB source and restart the loop each morning
- No scheduling: You cannot automatically switch between breakfast, lunch, and dinner menus by time of day; you are limited to one loop running all day
- No live data: There is no easy way to show real time content like the current clock, weather, news feeds, or social media counters
- Single-screen management only: Each TV operates independently, making multi-screen venues difficult to manage consistently
- No remote troubleshooting: If something goes wrong, staff must physically interact with the TV to diagnose and fix the issue
Similarly, traditional print signage is static and incurs recurring costs every time you need to update menus, making it less flexible and more expensive over time. Digital signage can reduce long-term costs by eliminating the need for recurring print production.
For venues whose menus evolve frequently or who want dynamic features, these limitations push them toward proper digital signage.
Option 2: Turn your TV into a digital signage menu board
Digital signage software is a tool that lets you send images, videos, and text layouts from an online dashboard to one or more TVs in real time. Digital signage software enables users to manage and distribute content to one or more playback devices. Instead of physically swapping USB files, you manage everything from a browser on any computer or tablet. Digital signage systems can be either networked or standalone, with networked systems enabling remote updates and dynamic content delivery.
The typical setup involves installing an app on a smart TV or attaching a small media player (like an Android box or Chromecast) via HDMI. Once connected, changes you make in the cloud-based dashboard appear on your screens within seconds—without anyone touching the TV.
Here is how this approach contrasts with USB limitations:
- Remote updates: Change a price from home or another location without visiting the venue. Networked systems are managed through centralized content management systems (CMS), often cloud-based, enabling remote updates, scheduling, real-time data integration, and dynamic content delivery through a suite of services and integrations.
- Scheduled playlists: Automatically switch content by time of day (breakfast, lunch, happy hour)
- Multi-screen control: Manage several TVs from one account, showing the same menu or different content on each
- Dynamic widgets: Display live data like time, weather, local events, or social media follower counts
- Centralized management: Multi-location operators can push consistent updates across all sites simultaneously
- Reliability monitoring: Many content management systems alert you if a screen goes offline
Digital signage empowers businesses across various industries with dynamic, real-time solutions that engage audiences and drive results.
Choosing hardware for digital signage
You have two main paths for getting digital signage onto your TV: use the smart TV’s built-in apps or connect an external media player.
Smart TV apps work on recent Samsung Tizen, LG webOS, and Android TV/Google TV sets. You simply install the signage app from the TV’s app store, pair it with your account, and start pushing content. This keeps your setup simple with no extra devices to manage.
External media players plug into your TV’s HDMI port and run signage apps independently. Popular options include:
- Amazon Fire TV Stick 4K
- Chromecast with Google TV
- Generic Android TV boxes from brands like Xiaomi or Nvidia Shield
- Purpose-built commercial players from signage vendors
Benefits of using a separate player include easier replacement if it fails, more frequent software updates, and better remote management features. The player handles the computing while your TV simply displays the output.
Either approach requires a reliable Wi-Fi or Ethernet connection so the devices can fetch new content and schedules. Plan your network setup accordingly before mounting screens.
Core features to look for in menu board software
When evaluating digital signage solutions for your digital menu board, focus on features that save time and reduce errors:
- Scheduled playlists: Automatically change menus by time and day (e.g., weekday breakfast 7:00-11:00, lunch 11:00-15:00, happy hour 17:00-19:00)
- Remote browser access: Managers can update items anytime from any device without visiting the venue
- Multi-screen support: Show the same menu on two TVs or dedicate one screen to food and another to drinks—all from a single account
- Template libraries: Non-designers can quickly adjust menu items and prices using pre-built layouts. Digital signage solutions often offer templates and apps to help users create amazing digital signage content.
- Compatibility with common tools: Import designs from PowerPoint, Canva, or Google Slides to leverage work you have already done
- Roles and permissions: Larger organizations can control which users can edit and publish content
These features represent what separates proper digital signage from simple slideshow players.
Advantages of Standard Digital Signage
- Remote management: Update content from anywhere, anytime.
- Scheduling: Automate menu changes by time of day or day of week.
- Multi-screen and multi-location support: Manage multiple displays easily.
- Dynamic content: Integrate live data, widgets, and real-time updates.
- Centralized control: Streamline operations for larger businesses.
Disadvantages of Standard Digital Signage
- Subscription fees: Most solutions require ongoing monthly payments.
- Initial setup complexity: Requires learning new software and possibly configuring hardware.
- Internet dependency: Needs a stable connection for updates and remote management.
Design tips for readable TV menu content
Good software means nothing if your menu is hard to read. Here are concrete visual tips specifically for TV readability:
- Use high contrast: Light text on dark backgrounds (or vice versa) ensures prices pop; avoid busy photo backgrounds directly behind text
- Size fonts appropriately: For a 40-55 inch screen viewed from 2-3 meters, use at least 32-40 pt for item names and 48+ pt for category headings
- Group logically: Organize items into columns by category (burgers, salads, drinks, desserts) with clear headings so customers can scan quickly
- Include price anchors: Add “from $X” or “starting at $X” labels near key categories to set expectations at a glance
- Limit animation: Subtle motion can capture attention, but constant movement distracts from the menu itself; keep video tag elements short (6-10 seconds max)
- Leave white space: Crowded layouts overwhelm viewers; give each section room to breathe
These principles help deliver an excellent way to communicate your offerings without forcing customers to squint or ask staff for clarification.
Displaying your menu in real time
One of the most elegant advantages of embracing digital signage software for your digital menu board lies in the refined capability to refresh your menu in real time. With purposeful clicks in your content management system, you can thoughtfully adjust prices, swap out dishes with intention, or spotlight special offers—no need for the tactile ritual of reprinting menus or the hands‑on charm of updating chalkboards. This flexibility feels especially meaningful for restaurants that celebrate daily specials, craft limited‑time promotions, or honor seasonal items with authentic reverence.
A digital menu board ensures your guests always encounter the most current menu, creating an experience that’s both seamless and emotionally satisfying—reducing confusion while capturing those “wow moments” that might otherwise slip away. Real time updates allow you to respond with genuine responsiveness to inventory changes or customer demand, keeping your menu fresh and purposefully relevant. With digital signage solutions, you can orchestrate all your screens and content from a single, thoughtfully designed dashboard, making it feel almost effortless to coordinate updates across multiple locations or devices. For restaurants seeking to craft streamlined operations while delivering experiences that feel both professional and personally invested, real time menu management becomes more than a feature—it’s a statement piece that speaks to your brand’s commitment to meaningful guest engagement.
Pairing your screens with a media player
To bring your digital menu board to life — that magical transformation from static to dynamic — you’ll need to connect your TV screen to a media player. Playback devices manage the storage, processing, and transmission of multimedia content to digital signage displays. This compact, elegant device nestles into your TV’s HDMI port with satisfying precision, streaming digital content from your computer, cloud dashboard, or other devices with almost effortless grace. The setup creates something wonderful: dynamic menus that dance across your screen, videos that captivate, and images that breathe with life — all accomplished with delightful simplicity.
When choosing a media player for your business, consider the elements that will shape your guests’ experience — the number of screens you want to orchestrate, the crystal-clear resolution you crave (many support gloriously crisp 4K displays), and whether you desire Wi-Fi connectivity for those seamless remote updates that feel like magic. Some media players arrive like thoughtful gifts, bundled with intuitive software that makes your digital signage journey feel natural from the very first moment. Simply nestle the device into your TV, connect it to your local network with a gentle click, and suddenly you’re empowered to craft your menu content from any computer or mobile device — anywhere, anytime. This approach gifts you the remarkable flexibility to refresh your offerings whenever inspiration strikes, ensuring your digital menu board becomes a living, breathing reflection of your culinary creativity and evolving vision.
Applications of digital signage menu boards
Benefits of Digital Menu Boards
Digital signage menu boards are weaving a kind of magic into how restaurants connect with their guests — creating moments that feel both purposeful and delightfully engaging. Beyond the simple act of displaying a menu, these luminous canvases become storytellers, showcasing the artistry of special offers, the charm of daily specials, and the visual poetry of signature dishes that capture hearts and inspire appetites. Restaurants discover in digital signage a voice for highlighting the excitement of promotions, sharing the rhythm of business hours, and even curating news feeds or local happenings — keeping guests informed while nurturing a sense of belonging and anticipation.
Picture, for instance, a café that dances through breakfast, lunch, and dessert menus with the grace of changing daylight, or a bar that illuminates happy hour treasures and upcoming celebrations with the warmth of invitation. Through the alchemy of dynamic content and captivating visuals, digital menu boards help restaurants craft their unique presence, kindle genuine customer engagement, and weave experiences that linger in memory — transforming the ordinary act of dining into something wonderfully human and emotionally resonant.
Measuring audience engagement with your menu board
Understanding Guest Interaction and Analytics
There’s something genuinely magical about watching how guests connect with your digital menu board—it’s like having a window into their hearts and minds. Modern digital signage solutions offer these wonderful analytics tools that capture the most human moments: how long someone lingers over your carefully crafted menu, which dishes make their eyes light up with interest, and which special offers spark that delightful “I have to try this” excitement. When you dive into this treasure trove of genuine guest behavior, you’re not just crunching numbers—you’re discovering stories that help you create even more meaningful dining experiences, fine-tune your pricing with real heart, and craft promotions that truly resonate with what people crave. Picture this: your analytics reveal that one particular dish consistently brings joy to your customers, so you lovingly feature it more prominently or weave a special story around it that makes it even more irresistible. This beautiful dance of tracking engagement isn’t just about measuring success—it’s about ensuring that every investment you make creates authentic value that touches both your business and the guests who walk through your doors.
Context-aware content: making your menu board smarter
Creating Smarter, More Responsive Menu Boards
Today’s digital signage solutions transcend mere static displays—they become living, breathing companions that sense the rhythm of your business and respond with an almost intuitive grace. With context-aware intelligence, your digital menu board awakens each morning to greet customers with warm breakfast offerings, gracefully transitions to vibrant lunch selections as the sun climbs higher, and transforms into an evening showcase of dinner delights—all flowing seamlessly like a choreographed dance, without a single human touch needed to guide its movements.
You can weave your content into the fabric of local life—celebrating community festivals, embracing seasonal holidays, or responding to the day’s weather with the sensitivity of a thoughtful neighbor who always knows just what you need. Many businesses discover that digital signage becomes their silent storyteller, blending static imagery with dynamic videos and interactive elements that don’t just capture attention—they create those precious “wow moments” that spark genuine delight and forge lasting memories. By nurturing your menu board into something smarter and more emotionally responsive, you craft an experience that feels personal and alive, drawing customers into a relationship that extends far beyond a simple transaction.
Option 3: Create a nostalgic split-flap style TV menu with Split-Flap TV
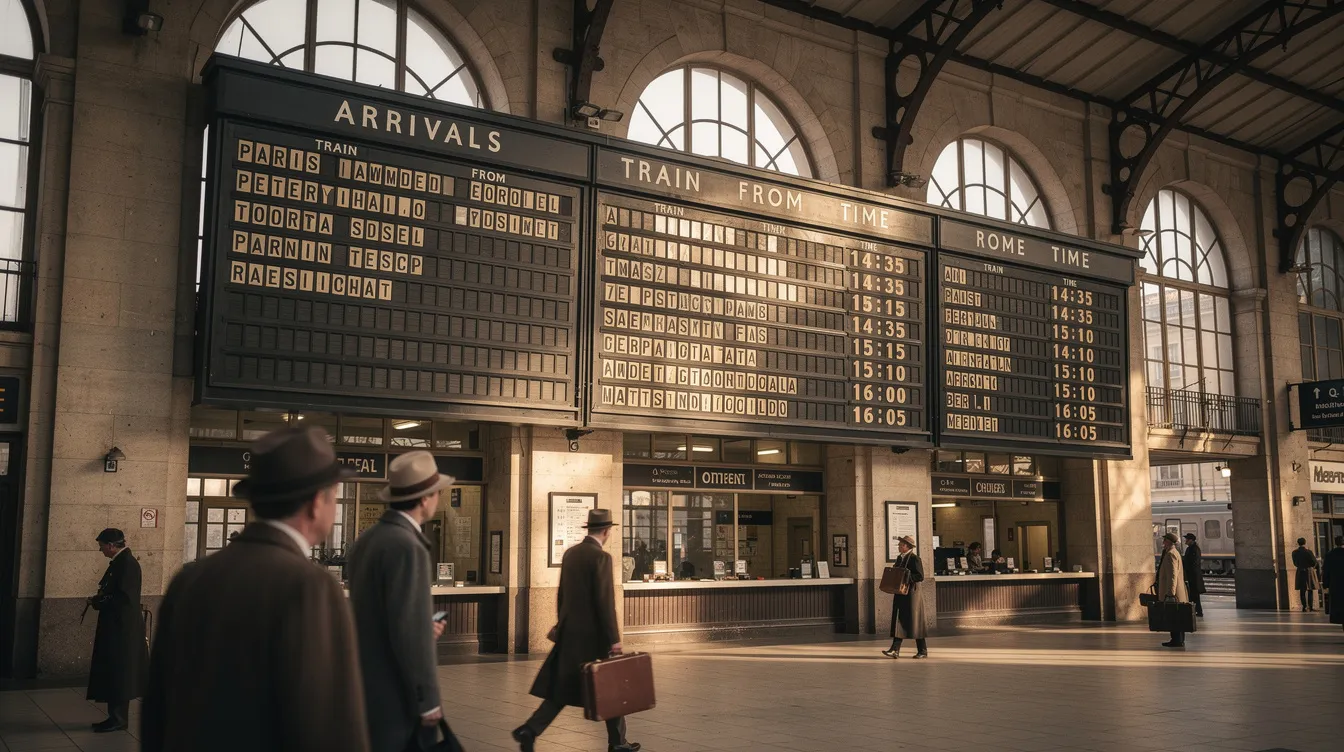
Split-Flap TV is a subscription-based SaaS that recreates classic 1960s airport and train station split-flap boards on modern TVs. Instead of static images or generic slideshows, your menu looks like a mechanical board where characters flip into place—evoking the nostalgia of vintage transportation hubs and European train stations.
This approach stands apart from standard digital signage in both form and function. Where typical menu boards blend into the background, a split-flap display becomes a conversation piece. Guests notice the distinctive flipping animation, often photographing it for social media. For bars, cafés, hotels, and retail storefronts seeking an Instagram-worthy focal point, this visual uniqueness translates directly into brand personality and customer engagement.
Our Split-Flap TV software, the perfect blend of nostalgia and modern technology, runs on common smart TVs, Android and Apple devices, and external media players—so you can use screens you already own without specialized hardware.
How Split-Flap TV works on your existing screens
Getting started takes under an hour. Here is the basic setup:
- Sign up for a Split-Flap TV account (we offer a 7-day free trial)
- Install the Split-Flap TV app on your smart TV, Apple TV, Android TV device, or other compatible media player
- Link the screen using a simple pairing code displayed on your TV
- Create boards in the Split-Flap TV dashboard from any browser—add menu items, prices, happy-hour times, weather, and social media counters
- Assign and publish to your paired screen; content appears within seconds
The dashboard lets you organize content into sections (cocktails, draft beer, lunch specials) and set timing for how the flaps rotate through different categories. Guests see your menu appear character by character, just like the mechanical boards of decades past.
Our 7-day free trial spans an entire real service week—including busy Friday and Saturday evenings—so you can see how guests react before subscribing. There is no credit card required to start, and you can test on devices you already have.
Advantages of a split-flap style TV menu vs generic digital signage
Split-Flap TV delivers the same core benefits of digital signage (remote updates, scheduling, multi-screen control) while adding distinctive features that generic platforms cannot match, making it a compelling future-facing digital signage platform:
- Visual uniqueness: The flipping animation catches attention and creates an Instagram-worthy focal point that generic slideshows cannot replicate
- Text-driven editing: Update items, prices, and messages by editing text fields—no re-exporting images required, making it ideal for daily specials or seasonal menus
- Built-in widgets: Display real-time clock, date, local weather, countdowns (e.g., “Happy Hour starts in 05:00”), and social media follower counters that update automatically
- Board-optimized layouts: Instead of free-form slides, templates are designed specifically for list-style content with columns (name, style, ABV, price)
- Scalable subscription tiers: Economy, Business, and Cockpit plans let small cafés start affordably while larger restaurants manage multiple screens and locations from one account
- Atmosphere-building design: The retro aesthetic complements industrial, vintage, and boutique interiors while creating a memorable brand touchpoint
Where a nostalgic board really shines (use cases)
The revolutionary Split-Flap TV aesthetic works particularly well in certain settings:
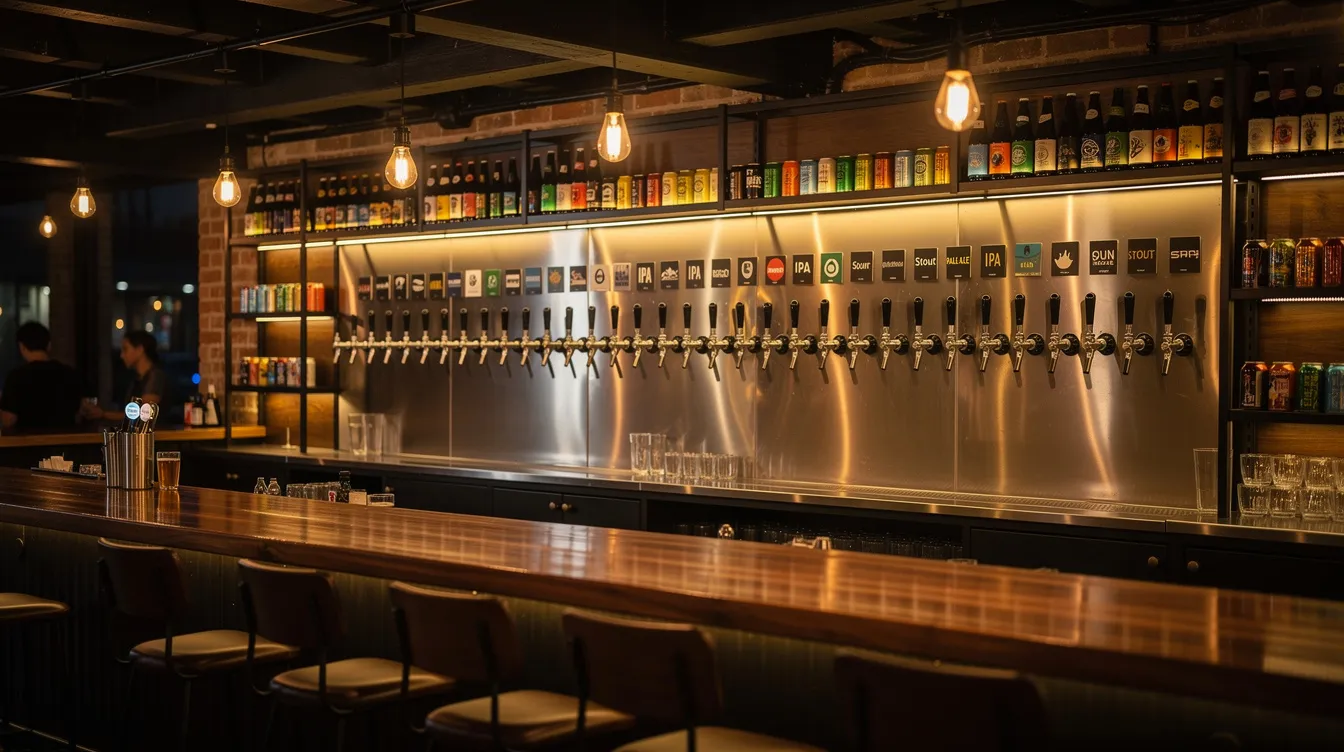
Craft beer bar with rotating taps: A bar with 20 taps uses Split-Flap TV to display each beer’s name, style, ABV, and price in rows. The board flips through sections every few seconds, and when a keg kicks, staff update that line from a tablet in under a minute. The mechanical flip effect reinforces the idea of constant rotation and discovery—exactly what craft beer enthusiasts expect.
Hotel lobby welcome board: A boutique hotel deploys an innovative retro message board powered by customizable Split-Flap TV as a combined welcome wall and mini café menu. It cycles between “Welcome to Hotel X,” check-in/check-out times, local weather, and coffee selections. As the board flips between modes, guests get practical information alongside travel nostalgia. Staff can add event announcements (“Jazz night at 20:00 in the bar”) without reconfiguring complex playlists.
Small restaurant with daily specials: A bistro that changes lunch dishes daily sets up a board for specials, similar to standout Split-Flap TV installations in our community. Before opening, the chef updates item names and prices from a phone in under a minute. If a dish sells out mid-service, they simply mark it as unavailable, and the board updates instantly—no designer needed, no files to export.
USB vs generic digital signage vs Split-Flap TV: which should you choose?
Each approach has its place depending on your venue’s needs, budget, and priorities.
USB slides represent the lowest cost and simplest setup. You need only a TV and a flash drive. This works well for menus that almost never change and venues where staff can handle occasional manual updates. But the operational friction—lost settings after power cuts, no scheduling, no live data—adds up over time.
Standard digital signage software transforms your TV into a fully remote-managed display with powerful scheduling, templates, and multi-location features. The trade-offs include monthly subscription fees and some initial setup complexity (choosing players, learning the dashboard). For venues that need cost effective flexibility without a distinctive visual style, this is the practical middle ground.
Split-Flap TV combines the functional benefits of cloud-based signage with a nostalgic, retro aesthetic that generic platforms cannot offer. The flipping animation creates atmosphere and social media engagement while the text-driven interface makes updates fast and simple. Subscription tiers support everything from a single café screen to multi-location hotel chains.
Here is a quick comparison:
- Setup time: USB takes minutes; generic signage takes 1-2 hours; Split-Flap TV takes under an hour with our guided process
- Ongoing updates: USB requires manual file swaps; generic signage allows browser-based edits; Split-Flap TV lets you edit text in seconds
- Atmosphere impact: USB and generic signage look standard; Split-Flap TV creates a conversation piece
- Best for: USB suits static menus on tight budgets; generic signage suits companies needing flexibility without style priorities; Split-Flap TV suits venues where brand personality and visual engagement matter
If you are ready to see how a nostalgic board can transform your menu display and explore more Split-Flap TV resources and tools, try Split-Flap TV’s 7-day free trial this week. Install the app on a smart TV or streaming device you already own, create your first board in minutes, and watch how customers react during a real service week. The flaps speak for themselves.